Connect HubSpot to Tarvent

Learn how to set up and manage the integration between HubSpot and Tarvent.
In this guide, you'll find:
- Overview
- Data Flow Overview
- Prerequisites
- Step-by-Step Setup Guide
- Post-Setup Maintenance
- Manual Syncing
- Troubleshooting
- FAQs
1 Overview
This integration keeps your contacts synchronized between Tarvent and HubSpot, supporting both one-way and bidirectional sync. It utilizes OAuth 2.0 for secure authentication and provides real-time synchronization, along with additional manual sync options.
Contact Synchronization
- Real-time contact updates
- Bidirectional or one-way contact syncing
- One-way list syncing (HubSpot static lists ↔ Tarvent groups)
- Standard and custom property mapping
- Manual sync available
Journey Actions & Triggers
- Trigger journeys from contact and deal changes
- Update contact details and deals
- Add tasks and notes
- Change deal stage
2 Data Flow Overview
Tarvent
- Contacts
- Subscription status
- Contact updates
- Campaign data
HubSpot
- Contacts & Lists
- Deals & stages
- Pipelines
Sync Direction: One-way or Bidirectional | Frequency: Real-time with manual sync available
If you have live syncing enabled (See options below), contact data syncs automatically. Updates in one platform appear in the other within minutes.
3 Prerequisites
Before you start: Confirm that you have a HubSpot account and admin access for both platforms.
- HubSpot Account
You’ll need an active account.
- Admin Access
Administrator rights are required in both Tarvent and HubSpot to set up integrations. HubSpot admin access is also needed so Tarvent can create its custom contact properties.
- Tarvent Account
You’ll also need an active Tarvent account.
4 Step-by-Step Setup Guide
Step 1: Access Integration Settings

- Go to Account Settings
In Tarvent, navigate to Account > Integrations.
- Select HubSpot
Click the integration card.
- Add an Account
Click Add an account in the top-right corner.
Step 2: Connect to HubSpot

- Select Audience
Pick the Tarvent audience you want to sync with HubSpot.
Note: Each audience can connect to only one HubSpot account.
- Authenticate with OAuth
Click Connect to authorize via HubSpot.
- Authorize Access
Choose the HubSpot account you want to connect, then review and approve the requested permissions.
Step 3: Configure Settings

- Notification Email
Enter an email for sync notifications. This is required.
- Choose which contacts to sync
HubSpot doesn’t use tags, so you control which contacts sync with a property-based filter. Pick one:
- All contacts: Sync every contact in your HubSpot account.
- Tarvent sync property: Only sync contacts where Tarvent’s sync checkbox property is enabled in HubSpot.
- Property filters: Only sync contacts that match the HubSpot contact properties you specify (for example, lifecycle stage or country).
Note: Tarvent automatically creates the sync checkbox property in HubSpot the first time it’s needed.
- Additional Options (Optional)
- Sync one-way only: Only transfers contacts from HubSpot to Tarvent. This applies to the sync as well as live contact additions and updates.
Step 4: Map Fields

Tip: Hover the help icons in Tarvent for field mapping guidance.
- Review Default Mappings
Similar fields are auto-mapped. Verify each field mapping before continuing.
- Map Custom Fields
Match HubSpot properties to Tarvent data fields:
- Text properties (single-line and multi-line text): Text, URL, Image, Email, State, Zip code (Tarvent data types)
- Dropdown, radio, and multiple-checkbox properties: Text (Tarvent data type)
- Date and date-time properties: Date, DateTime, Birthday (Tarvent data types)
- Phone number properties: Phone, Text (Tarvent data type)
- Number properties: Number (Tarvent data type)
- Standard properties: HubSpot’s first name, last name, email, and address properties map directly to the matching Tarvent standard fields.
Special mapping cases
- Dropdown / radio properties: The value of this field will be mapped to a Tarvent text field using HubSpot’s internal option value. If this value is updated in Tarvent, it must match the HubSpot internal value for the sync to work.
- Multiple-checkbox properties: The value of this field will be mapped to a Tarvent text field as a semicolon-separated list of HubSpot’s internal values (ex. value1;value2). If this value is updated in Tarvent, the values must match the HubSpot internal values for the sync to work.
Note: All required fields must be mapped.
- Skip Fields
Any fields you don’t need can be marked as skip. All fields must be mapped or skipped.
Step 5: Finalize Setup
- Review Settings
Confirm all configurations before finishing.
- Start Sync
Click Finish setup & start sync. This will:
- Subscribe to HubSpot events for real-time updates
- Schedule the first sync
5 Post-Setup Maintenance
Monitoring Sync Status
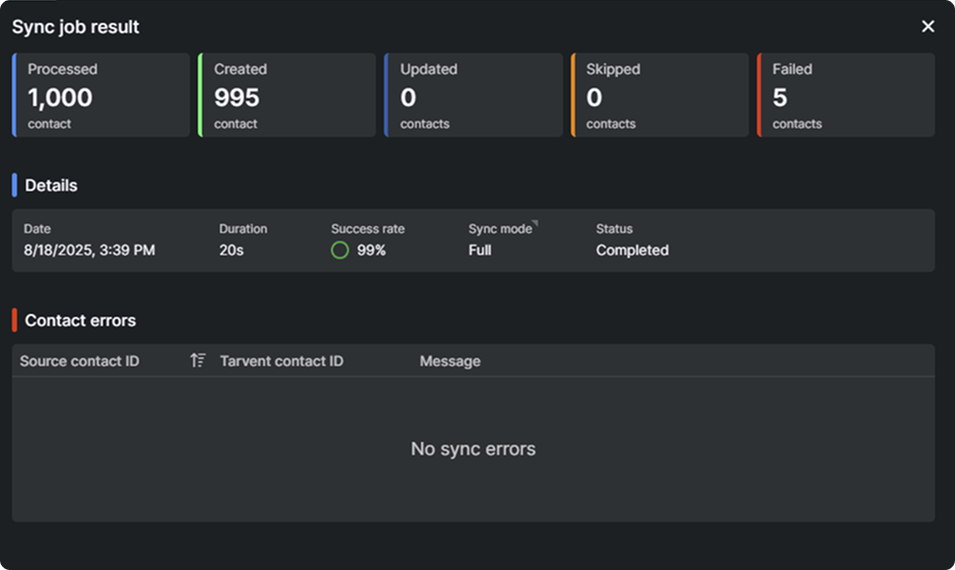
After setup, you can track the status of your integration directly in Tarvent:
- View sync history and results
- Check for sync errors or conflicts
- Review sync performance and statistics
Managing the Integration
You can manage your integration anytime through these options:
- Edit Settings: Adjust options, mappings, and notifications
- Manual Sync: Run an on-demand sync between systems
- Disable: Pause syncing without deleting the integration
- Delete: Permanently remove the integration
6 Manual Syncing
If live syncing isn’t enabled or you run into sync issues, you can trigger a manual sync between Tarvent and HubSpot:
- Go to Account > Integrations and select the HubSpot integration
- Open the integration you want to sync
- In the settings dialog, click the Sync button at the bottom-right
- Choose a sync type:
- Full sync: Syncs all contacts from HubSpot to Tarvent
- Incremental sync: Syncs only new or updated contacts since the last manual sync.
- Click Sync to start
Note: Manual sync times will vary, depending on volume. You don’t need to stay on the page while it runs.
7 Troubleshooting
Common Issues
If you run into problems, here are common issues and fixes:
- Sync not starting: Ensure the integration is enabled and your sync settings are correct
- Field mapping errors: Confirm field types are compatible and mapped correctly
- Custom properties not created in HubSpot: Tarvent needs admin permission to create properties — reconnect with a HubSpot account that has admin access
- Finish button disabled: Double-check all settings and mappings
- Save button disabled: Look for red dots next to tabs, which indicate missing settings or mappings