Creating a new audience
Learn how to create an audience, and how to turn on support for multiple audiences when you need it.
What we'll cover
- Concepts
- Enable multiple audiences
- How to create a typical audience
- How to create an audience with a custom contact identifier
Warning: In most cases, you should only have a single audience. Groups and segments are usually all you need to separate contacts. Read more in Concepts below.
1 Concepts
Multiple audiences
Most accounts only need one audience. Multiple audiences can help when you manage multiple brands or truly different contact types (for example, vendors and customers) that require very different fields and profile data.
Keep these tradeoffs in mind:
- Content and automation are audience-specific. Campaigns, journeys, forms, landing pages, surveys, and reports are linked to a single audience. If you want to send the same campaign to two audiences, you will create and send it twice.
- Unsubscribes are isolated. If a contact unsubscribes from one audience, they are unsubscribed from that audience only. This can be helpful when one person is both a vendor and a customer and should be able to opt out of one without affecting the other.
Before creating multiple audiences, ask yourself if groups and segments inside one audience would accomplish the same goal with less overhead.
Custom contact identifier
By default, a contact’s email address is the contact identifier. Some businesses need something else. For example, a loyalty program might use a loyalty ID, and multiple loyalty accounts could share the same email address.
Tarvent lets you choose one field, or a combination of fields, to identify contacts. When you use a custom identifier, the selected field values must be provided when importing contacts or adding contacts manually.
When multiple contacts share the same email address, that inbox will receive one email per matching contact. To reduce confusion, use personalization in your campaign so the recipient can tell why they received more than one message.
2 Enable multiple audiences
Multiple audiences are turned off by default. To enable them:
- In the main navigation, click Account.
- Select Settings.
- Find the Multiple audiences section.
- Turn on Enable multiple audiences.
After you enable multiple audiences:
- In the main navigation, click Audience.
- Instead of being taken directly into an audience, you will see an Audience list.
- Click the option to Add a new audience, then follow the steps in the sections below.
3 How to create a typical audience
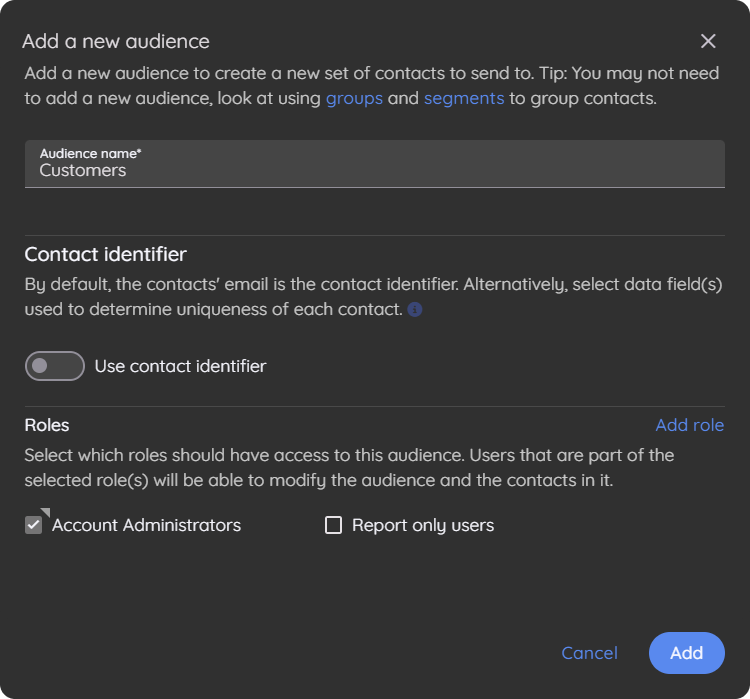
Here are the steps:
- Enter the audience name. Use a descriptive name that matches the contacts you plan to store in the audience.
- Leave the contact identifier as-is.
- Select roles that should have access to the audience.
Note: Unselected roles will not have access to the audience or anything linked to it, including campaigns, journeys, landing pages, surveys, and more.
4 How to create an audience with a custom contact identifier
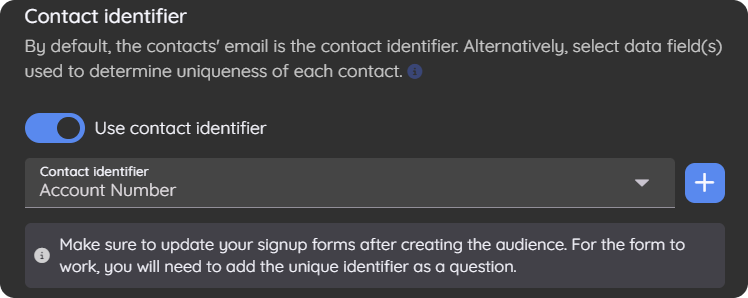
Here are the steps:
- Enter the audience name. Use a descriptive name that matches the contacts you plan to store in the audience.
- Set the contact identifier. Select one field or multiple fields. If the field you need does not exist (for example, "Account number"), click Add to create it, then select it as part of the identifier.
Note: Identifier fields become required when importing contacts and when adding contacts manually.
- Select roles that should have access to the audience.
Note: Unselected roles will not have access to the audience or anything linked to it, including campaigns, journeys, landing pages, surveys, and more.