Importing contacts via email
Learn how to import contacts using email.
What we'll cover
1 Concepts
Email-based imports
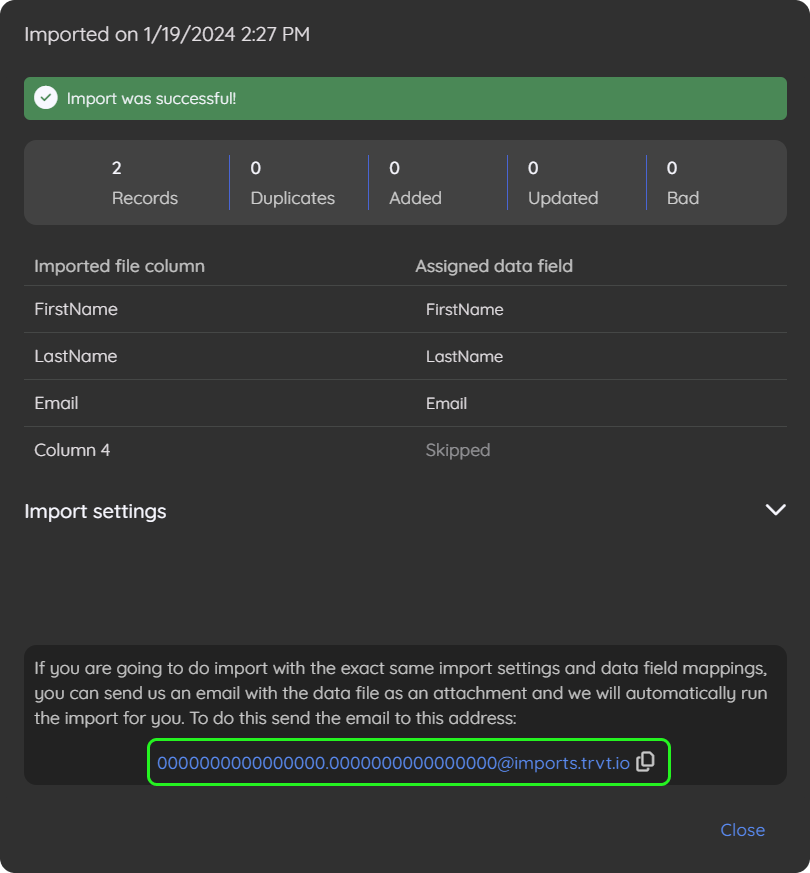
Speed up the import process or automate your ongoing imports using email instead of the manual process online. Email-based imports will significantly decrease the time it takes to import new files by eliminating the need to configure the import each time the file with the same format and import settings are used. If you have not imported a file manually, please refer to our guide on import contacts via file upload.
File formats
When importing a file via email, you must use the same format as the one you used for the manual import, including the file type, number of columns, order of columns, and delimiter used to separate each column.
What if my file format changes?
Suppose you need to change the file format of your emailed imports. In that case, you must first import the file manually as outlined in the import contacts via file upload help guide. Once your import is complete, you will receive a new email address for future email-based imports.
2 How to import contacts via email
Here are the steps:
- Go to the imports page of the audience to which you would like to import contacts.
- Click on a previous import.
- Copy the email address
- Open your email client, such as Outlook, Gmail, or other program, and create a new email.
- Paste the copied email address into the "To" box.
- Attach your data file to be imported. Please note that the maximum file size is 50 MB. However, your email provider may limit the file size to less than 50 MB.
- Click Send
Note: Your email's subject line and message body will be ignored and are not required. Once your import is processed, you will receive a notification with the results.