Testing a campaign
Learn how to send a test version of a campaign so you can preview content, verify personalization, and check conditional content before scheduling.
What we’ll cover
- Open the test dialog
- Preview and subject prefix
- Choose personalization values
- Choose who receives the test
- Testing notes and limitations
1 Open the test dialog
- Click Campaigns from the primary navigation on the left.
- Find the campaign you’d like to test.
- Click the campaign to open the campaign editor.
- Click Test at the top right.
2 Preview and subject prefix
When the test dialog opens, you’ll see a preview of your campaign. You’ll also see an option to prepend Test: to the subject line so it’s easy to spot test sends in your inbox.
Click Next to continue.
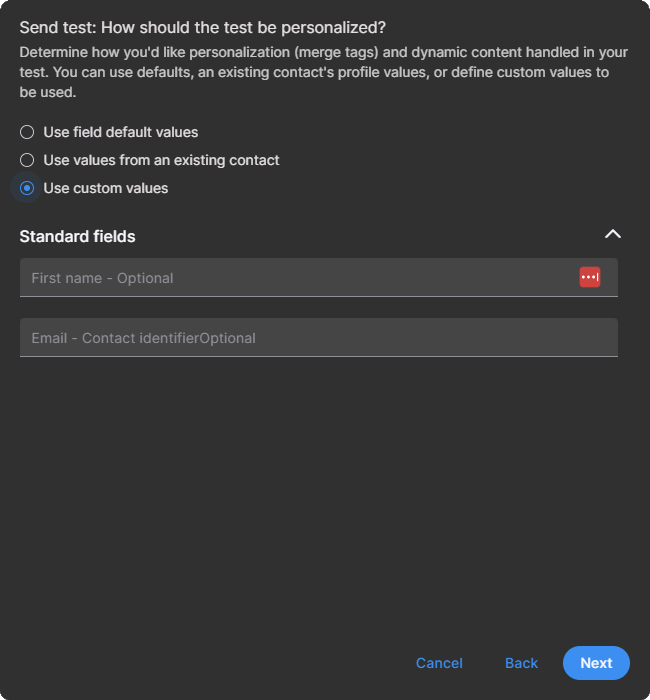
3 Choose personalization values
Next, choose how personalization fields and dynamic content are populated for the test. There are three options:
Use field default values
Uses default values set for custom fields in your audience. Standard fields (like first name and last name) do not have default values, so those personalized values may appear empty. This is helpful for seeing how your email looks when personalization data is missing.
Use values from an existing contact
Personalizes the test using profile data from an existing contact. This is helpful when you have test contacts with specific data for different scenarios (especially when using conditional content).
- Search for a contact by email address and select them.
- This controls the personalization data only. It does not control the email address that receives the test.
Use custom values
Shows a list of fields used by your campaign for personalization and conditional content, and lets you type in the values you want. This works well when you don’t have test contacts set up, but still want to validate a specific scenario.
Click Next to continue.
4 Choose who receives the test
Choose who the test email is sent to. You can send to a combined total of up to 30 recipients.
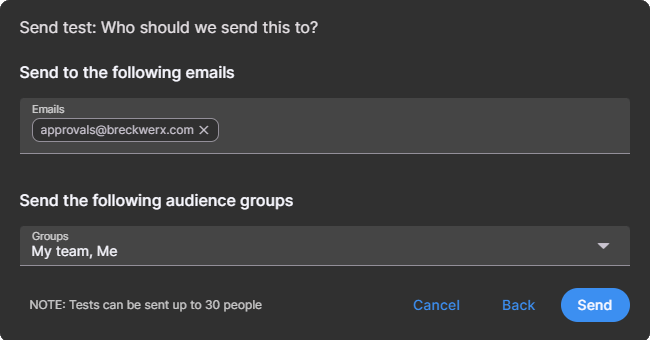
Option A: Add email addresses
- Click into the Emails box and type an email address.
- Press Enter.
- Repeat for additional recipients.
Option B: Send to groups and segments
- Select one or more groups.
- Select one or more segments.
You can use either option (or both). After you set up a test once, Tarvent remembers your last test settings so you can send another test quickly after making edits.
5 Testing notes and limitations
- Links are not tracked in test sends.
- System links won’t work in test sends (for example, profile update and unsubscribe) because the email isn’t tied to a known contact.