Updating a campaign
Learn how to update an existing Tarvent campaign, including your email content, element styling, From & Subject details, campaign settings, social share settings, and link checking.
What you’ll learn
- How to open a campaign for editing
- How to update From & Subject details
- How to update content (rows, columns, and elements)
- How to update element styling and options
- How to update campaign settings, share settings, and run the link checker
- How saving, versions, and the checklist work while you edit
What we’ll cover
- Open a campaign for editing
- Update From & Subject
- Update campaign content
- Update an element’s settings
- Undo and redo changes
- Update campaign settings
- Update share settings
- Check links
- Saving, versions, and menu options
- Use the checklist
1 Open a campaign for editing
To edit an existing campaign:
- Select Campaigns from the main navigation.
- Click the campaign in your campaign list to open the campaign editor.
Tip: If you want a full walkthrough of the editor layout (rows, columns, elements), see Campaign editor.
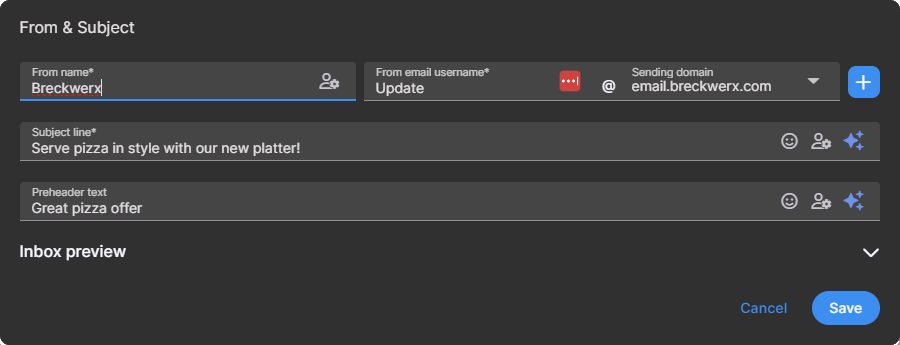
2 Update From & Subject
Use From & Subject on the left side of the editor to update:
- From name
- From email username
- Sending domain
- Subject line
- Preheader text
For details on From & Subject fields (including sending domains), see Creating a new campaign. If you need to set up or manage subdomains used for sending and tracking, see Managing subdomains.
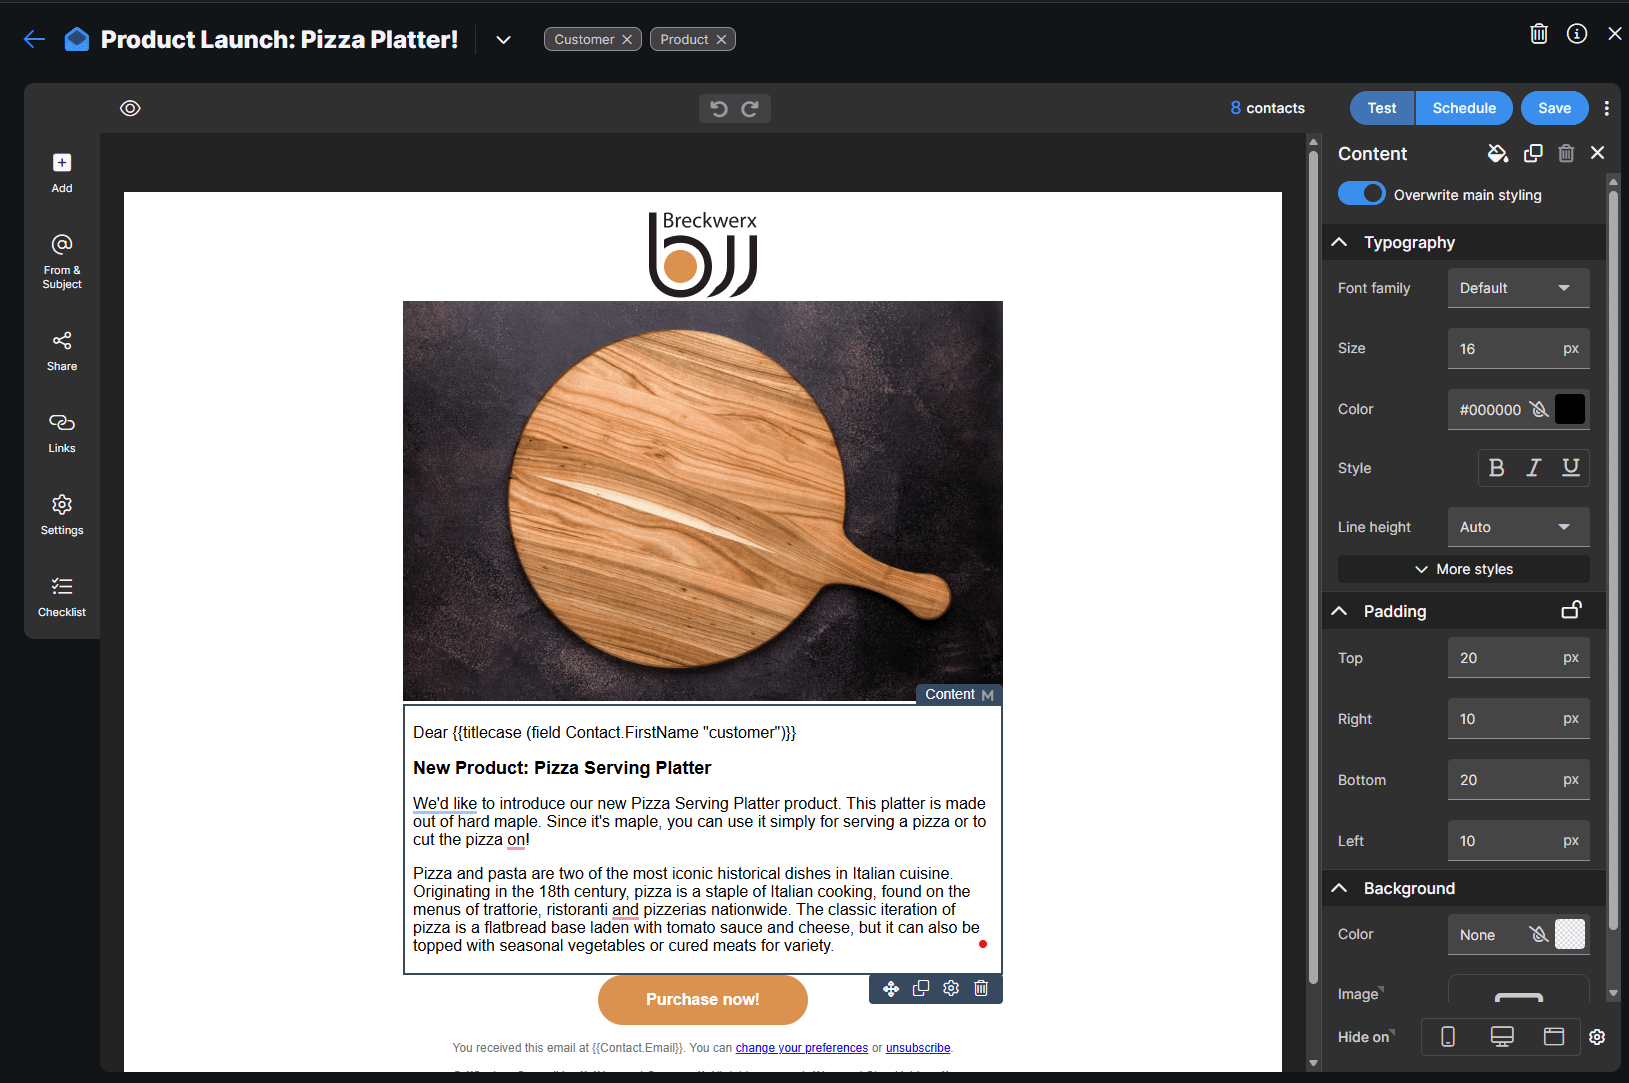
3 Update campaign content
Your campaign content is built from rows, columns, and elements. You can add, move, duplicate, and delete rows and elements at any time.
Where to find content tools
- Use Add on the left toolbar to insert rows or elements.
- Select an element in the email to edit its content and styling.
- Use the right-side panel to adjust settings for what you’ve selected.
If you want the step-by-step "start from zero" flow, see Creating a new campaign.
4 Update an element’s settings
To update an element inside your campaign (image, text, button, content block, and more), click the element in the editor. A properties panel opens on the right where you can adjust styling and options for that element type.
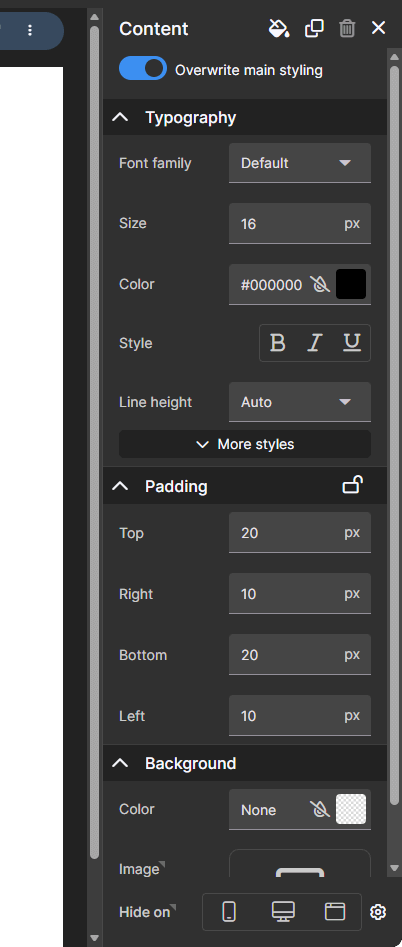
At the top of the element properties panel, you’ll see four action icons:
- Main styling: Switch to the main styling for the email (global styles that apply across the campaign). You can optionally override the main styling for an individual element to unlock more element-level styling controls.
- Duplicate: Creates a copy of the element. The copy will be placed to the right or below the original, depending on the layout.
- Delete: Removes the element from the campaign.
- Apply and close: Closes the properties panel. Most changes apply as you make them, but this closes the panel when you’re done.
Content element toolbar
Some elements (like the Content element) include an editing toolbar at the top of the element editor. The first options on the left are Tarvent-specific and help you work faster:
- Generate content with AI
- Insert personalization fields
- Set display rules for when the element is shown (conditional content)
- Insert images
- Link to documents (for example, a PDF)

5 Undo and redo changes
While editing, use the Undo and Redo buttons at the top center of the editor to step backward or forward through changes.
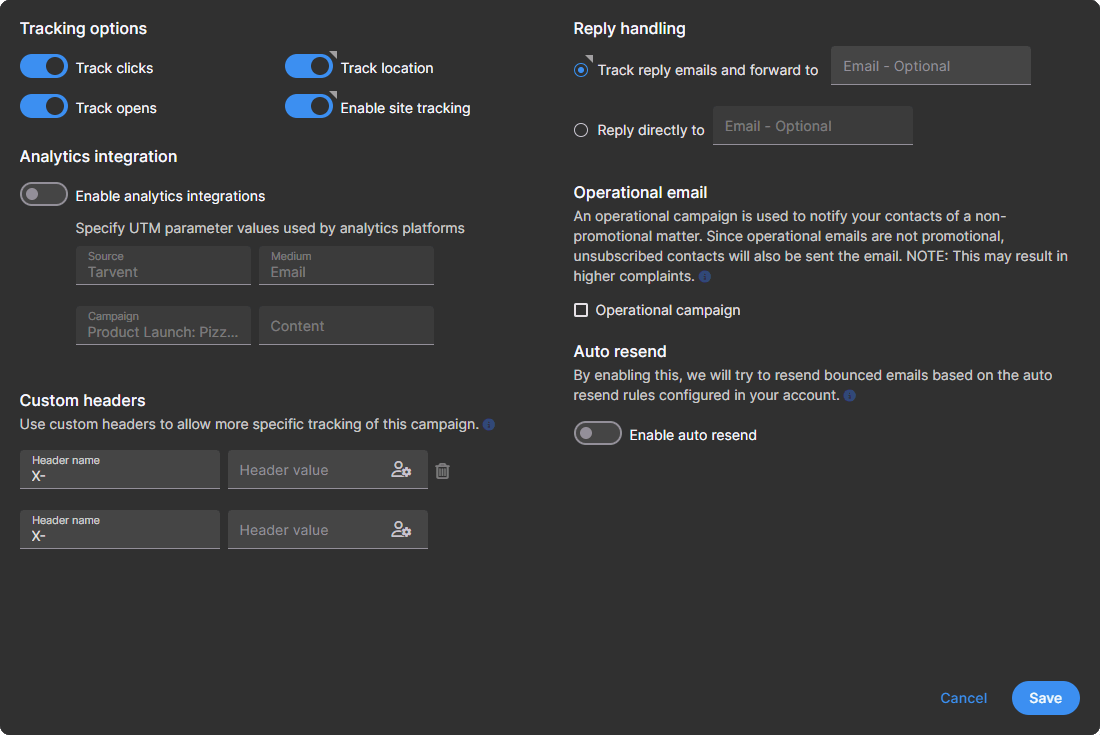
6 Update campaign settings
Click Settings on the left side of the editor to configure tracking, replies, analytics, and more.
Available settings
- Track links: On by default. Tracks click activity and routes clicks through Tarvent for reporting. If disabled, recipients go directly to the destination URL and clicks will not appear in the campaign report.
Note: Tarvent does not log an open event when a link is clicked. Opens are recorded when images are downloaded. - Track opens: On by default. Tracks opens when the recipient downloads images. If disabled, the campaign report will not show open activity.
- Track location: On by default. Attempts to determine recipient location. Results may be off if the recipient uses a VPN or their network routes traffic through a different area.
- Enable site tracking: On by default (if you’ve set up site tracking). Tracks where contacts go on your site after clicking. To configure site tracking domains, go to Account > Domains.
- Enable analytics integrations (UTM): Off by default. Adds UTM parameters to links for analytics tools (Google, Adobe, and others). If you keep it off, you can still add UTM parameters manually to links in your campaign.
- Custom headers: Add custom headers for advanced tracking or reply processing workflows. You can use the personalization icon to insert profile data into header values.
- Reply handling:
- Track reply emails and forward to: Replies are processed by Tarvent and forwarded to the address you provide. Out-of-office and common spam responses are filtered so you get valid replies.
- Reply directly to: Uses a friendlier reply-to address that the contact sees. No reply tracking or filtering is done.
- Operational email: Use only for operational notifications (store hours, contact info changes, service changes, and similar). Operational emails can be sent to unsubscribed contacts because they are not promotional. Sending marketing content as operational can violate CAN-SPAM or other requirements, so use this setting carefully and get legal guidance if you are unsure.
- Auto resend: If enabled, Tarvent attempts to resend bounced emails based on your account’s auto-resend rules.
7 Update share settings
Share settings control what the social preview looks like when your email is shared on a social network. This includes the title, image, and description.
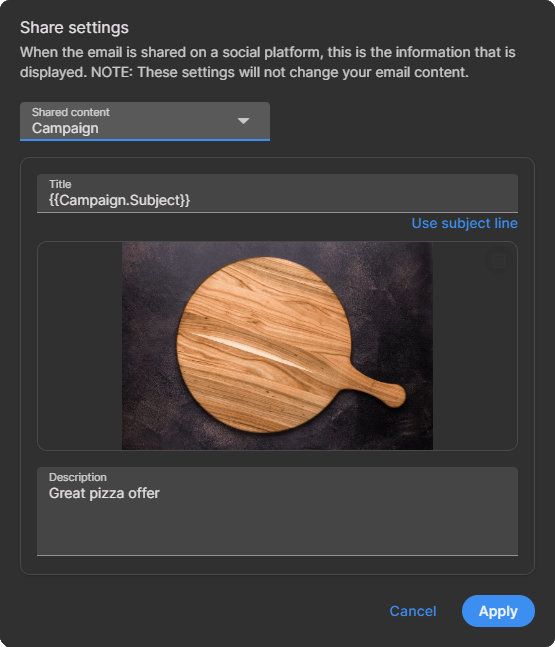
To update share settings
- Click Share on the left side of the editor.
- For the title, click Use subject line if you want the subject to populate the title automatically. (This uses a dynamic value that updates if your subject changes.)
- Click the image area to pick an image from your library or upload a new one.
- Update the description text (this appears below the image in the feed).
- Click Apply to save.
8 Check links
The link checker finds links in your campaign and attempts to verify them. Tarvent can follow redirects when needed. Some sites block automated verification, so a small number of links may require manual review.
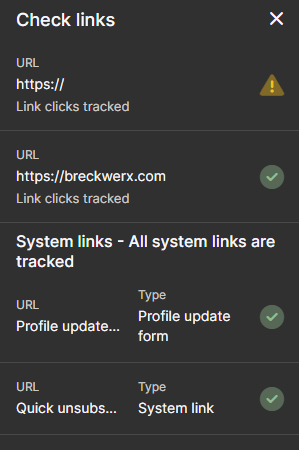
How to read link checker results
- Green check: verified
- Yellow caution: could not be verified (double-click to review manually)
- Red X: bad link
You’ll also see System links listed (these are tracked automatically), such as profile update forms, unsubscribe links, and other platform links.
9 Saving, versions, and menu options
Your changes can be saved automatically (auto-save) or manually (Save button).
Auto-save
When auto-save is on, changes are saved on a recurring interval (about every 30 seconds).
Versions and menu options
Use the campaign menu (top-right) for version history and other editing actions.

- Versions: Revert your campaign to a previous version. If you plan to switch versions, consider turning off auto-save first. If you don’t like the version you selected, you can pick another version before saving.
- Turn on autosave: Enables auto-save.
- Refresh: Reloads campaign content (helpful if someone else is editing the campaign at the same time).
- Change audience: Changes the audience used for personalization fields and who the campaign can be sent to.
- Duplicate: Creates a copy of the campaign (including settings) as a new campaign. For details, see Duplicating a campaign.
- Mark as ready: Marks the campaign as "Ready to send" so you can filter your campaign list by status. Handy when you manage many campaigns at once.
10 Use the checklist
Click Checklist to review common issues before scheduling. If you see a red dot on the checklist icon, Tarvent found something that needs attention (for example, missing subject line or missing unsubscribe link).
Some issues appear in more than one place. For example, missing From & Subject details can show a red dot next to From & Subject as well as Checklist.
Tip: If you add an unsubscribe link, save your content before checking the checklist again so the warning can clear.